
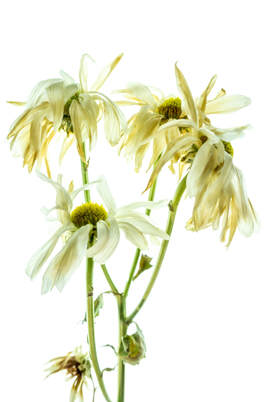
white petals when I talk about those that are clinging to that life force. The whole time I was manipulating the flowers, trying to find just the right angle in which to photograph them, not one petal dropped. It was as though their story was not over yet. It was as though they were saying to me, "I am worthy of a picture. I am still beautiful, with all my scars and in my old age." I, then, found this angle and click the shutter. I saw the beauty, and I understood Wabi Sabi.
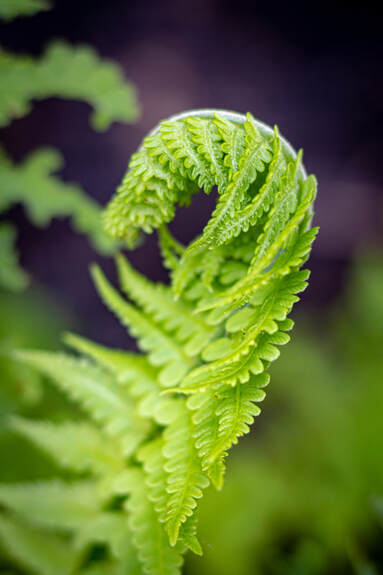 Something a lot of beginner photographers do is forget that they can take photographs from more perspectives than just standing. Often, they forget that their knees bend or that their arms raise. I think the longer I shoot, the more I learn to move and get on the perspective of my subjects. For instance, if I’m taking images of a butterfly on the ground, I’m probably going to put my camera on the ground to take the pictures. Often beginners spend their time looking down on low subjects or up on high subjects. An example of this would be taking a picture of a puppy. The instinct of the beginner photographer is to stand over the puppy and shoot down (having the puppy look up into the camera). While that image can work, a more compelling image tends to be to get down to eye level with the puppy and then take the picture. That works with most subjects with eyes—get on eye level. This works with subjects without eyes too. Get on the level with your subject. This fern is a case in point. I didn’t take the image from above. I got down, low to the ground and shot the subject on its level. I don’t think you would have been able to see the fern uncurling if I had shot it from above. Don’t be afraid to take your time, when taking pictures, and slowing down. Examine the scene and find the best angle from which to shoot. Above all else, have fun!! 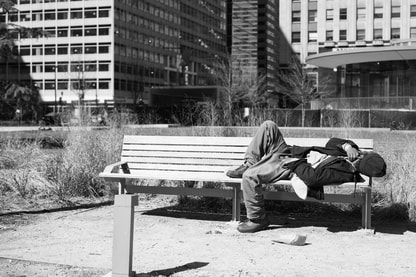 When I do street photography, I use Aperture Priority Mode, instead of Manual Mode, (Yes, most of the time, when I shoot, I use Manual Mode). There are times when I need to control my camera in a quicker manner than Manual Mode allows—street photography is one of those times. With my camera in Aperture Priority Mode, I set a Maximum ISO (such as 1600) and watch my shutter speed (depending on your camera, you may be able to set a minimum shutter speed. I have a Sony a6000, and unfortunately it does not have that feature, so I watch my shutter speed). I don’t allow it to go below 1/250 sec. (1/125 sec. at night). I keep my shutter speed above this threshold to avoid camera shake and to keep sharp images from movement. Then all I do is adjust my aperture. I also set my camera to continuous shooting (or burst mode) for moving subjects—since I have a shake and I find there is more of a chance of getting a sharp image using this mode. As for lens, I used my 35mm f/1.8 and 50mm f/1.8 lenses. I tend to use prime lenses for street photography because they usually have a better (or wider) aperture—allowing for more light to my sensor. This means I can keep my shutter speed faster without compromising by raising my ISO (which adds noise/grain to my photos). My settings, by no means, are a rule or everybody’s settings. They are also meant to be a starting point. They change for me depending on what I’m photographing while out too. For instance, if I decide to take a panning image of a bicyclist, my technique changes completely, and I focus on my shutter speed (instead of the aperture). The one important rule that I follow and suggest you follow when shooting street photography is: Have fun! |
What Is This Page?Since I love photography and teaching, I thought I would start a Blog page and share how I take my images, what I was thinking and about me. Categories
All
Archives
March 2022
Ready to Order
|
 RSS Feed
Proudly powered by Weebly