
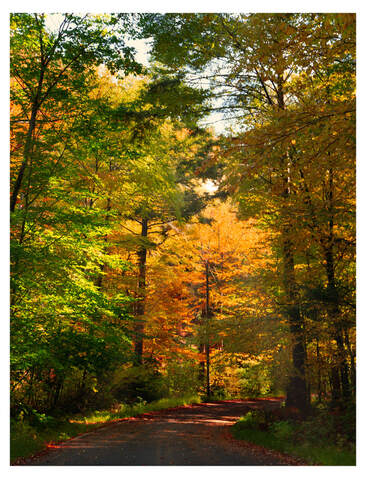
 Autumn is my favorite time of the year. I love the crisp air, the EVERYTHING pumpkin, but I especially love to grab my camera to capture the fall colors! Where do I go for the fall colors? When I plan a trip to photograph the changing colors of the trees, I always start by looking online at fall foliage prediction maps. They are a great tool for showing when the peak times for fall foliage is in different areas of the country. I, simply, search for the fall foliage maps in the areas I’m interested in going to, and I’m off!! One piece of gear that I make sure to take with me is a circular polarizer. It’s useful for a few main reasons. The first reason has to do with the fact that some leaves have a shiny look that is reflective and seems to cut the vividness of the colors. The polarizer has the ability to cut through glare that often appears on leaves. When it has been raining, the wet leaves reflect even more light than the dry leaves. The polarizer is effective in reducing this glare too. Another use for polarizers is intensifying the color in your image. You may be able to replicate it during post-processing, buy why not get it right in camera? You can choose the exact amount of saturation by merely turning the circular polarizer, on the front of the lens. As far as the glare is concerned, that is one effect you can’t delete in post-processing—only a circular polarizer will take away glare in your pictures. My favorite time to photograph is during golden hour. I love the warm light on the warm color tones of orange, red and yellow leaves. It makes them more vibrant. The fabulous light quality makes it worth the struggle of waking up early or staying out late to catch images on photo locations.
0 Comments
 I’ve been playing a lot lately. I thought I would explain how I made this image. This is actually a composite of three images—meaning I’ve blended three photos together to create one image. It’s a simple process where I took three photos (with the camera in the exact same location—using a tripod and a self-timer). The only thing different about the three photos is where I placed myself in the images (and what I’m doing). Otherwise, I made sure the camera stayed exactly in the same position so that the tree and the background matched up when the pictures were layered on top of each other for post processing. Once I made the images, it’s all a matter of Photoshop! I simply open the images as layers in Photoshop. That means that the photos are essentially laying on top of each other in a stack. Once the pictures load, I select all three photos and auto-align the images. This is where Photoshop makes sure that the images match up and the tree is in the exact same spot, as well as the other objects in the background. If there isn’t enough things in the right spots, this whole thing may not work. After I’ve made sure that the photos line up properly I’m ready to work with the first two images. I create a layer mask on the middle image, this will allow me to bring the bottom picture of me on to that middle image with the paintbrush. It’s as if I’m erasing away part of the middle picture to expose me from the bottom picture. This makes two of me show up in the middle image. Then, I repeat the process on the top image. I create a layer mask on the top image and paint in both pictures from the bottom layer and the middle layer. And voila! Three Me’s are in one picture! I know I explained it really fast. It’s not hard, but I didn’t explain where any of the buttons are. If you would like a detailed explanation of the process, go to: https://www.youtube.com/watch?v=F9Ly2T75_i0 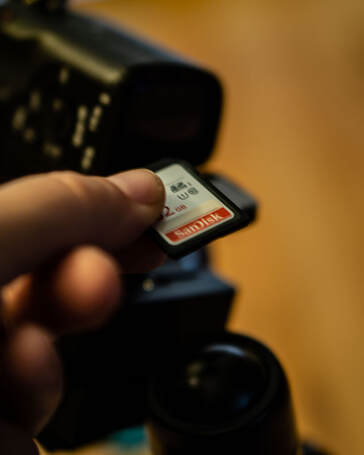
There are a couple of things that will remind you how important your memory card is in your photography process. One, let your card create an error when you go out on a shoot. Nothing is worse than having your card fail at an important time. Second, I think this one happens to everybody once, and that’s when you accidentally leave your card in your computer after editing your previous shoot! I’ve learned to keep my camera sitting next to my computer while my SD card is in the pc. I will not put my camera away until I’ve returned the memory card to its right home. Since I've started keeping my camera out (until the card has been put back in it) I’ve never made that mistake again! Believe me, once was enough!
In all seriousness, memory cards are a critical part of a camera’s equipment and without it, a modern-day digital camera is deemed useless. So, choosing the right card for taking one’s pictures is very important. You need a card that can accommodate the number of photos and keep up with the speed at which you shoot. This is a list of my top 4 (secure digital) SD cards for my camera. **Before I list the cards, I want to mention the size cards that I use. Although these cards go up and over 1Tb which may be appropriate for some cameras which shoot larger file sizes, my camera shoots 24 Mb files. I choose to use cards that are a maximum of 32Gb to 64Gb. My camera can hold larger cards. So, you may ask why I stay with this small of a card. Well, if I use a larger card and I have it almost filled and it fails, I lose ALL of those pictures. I rather stick with smaller cards thereby risking fewer pictures. Now, if your camera has dual memory card slots (so you can back your images up as you shoot) then go ahead and get larger cards, if you wish. Memory cards are fairly cheap. I can have extra with me. The list I’ve put together are based on a Sony a6000 and its read and write speeds. I learned its read and write speed numbers by searching for them online. Newer cameras and different makes and models will have different numbers. So, I would recommend that you look up your camera model’s read and write speed recommendations. You may think that the faster the card the better but having the fastest card may be useless. If your camera can’t use the technology, you could be wasting your money. Now, what are my top 4 SD cards for my camera? (These are affiliate links) 1.SanDisk Extreme PRO SDXC UHS-I with U3 64Gb
2. Lexar Professional Class 10 SDXC UHS-I 633X Speed 64Gb
3. Transcend 64GB SDXC/SDHC 300S Memory Card
4. PNY 64GB Elite-X Class 10 U3 V30 SDXC Flash Memory Card
|
What Is This Page?Since I love photography and teaching, I thought I would start a Blog page and share how I take my images, what I was thinking and about me. Categories
All
Archives
March 2022
Ready to Order
|
 RSS Feed
Proudly powered by Weebly