
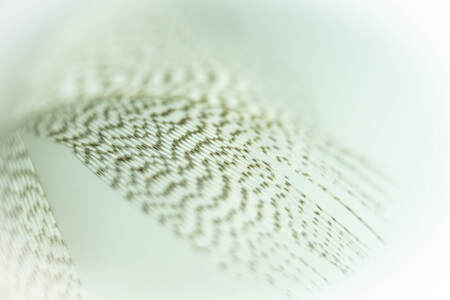
 What is High Key Photography? I consider an image that is bright and “airy,” with little or no shadows to be a high key photo. This feather would be an example of one of my high key photos. Sometimes this type of image is achieved by simply overexposing it some. However often to get a proper high key image, you need to give careful consideration to the light balance between the subject and the background. You want to be able to see the detail in the subject while using unnaturally bright light to nearly completely blow out the background. High key photography is often used with models, flowers and in my case a feather. It’s used to offer a light, airy, positive and upbeat mood. I’m not that familiar with using this technique. I used a flash and suspended (using a clamp) my feather over a white table. I think the image conveys a soft, light and airy look. I like the way it fades away. Let me know what you think of this picture. Did I achieve my goal?
0 Comments
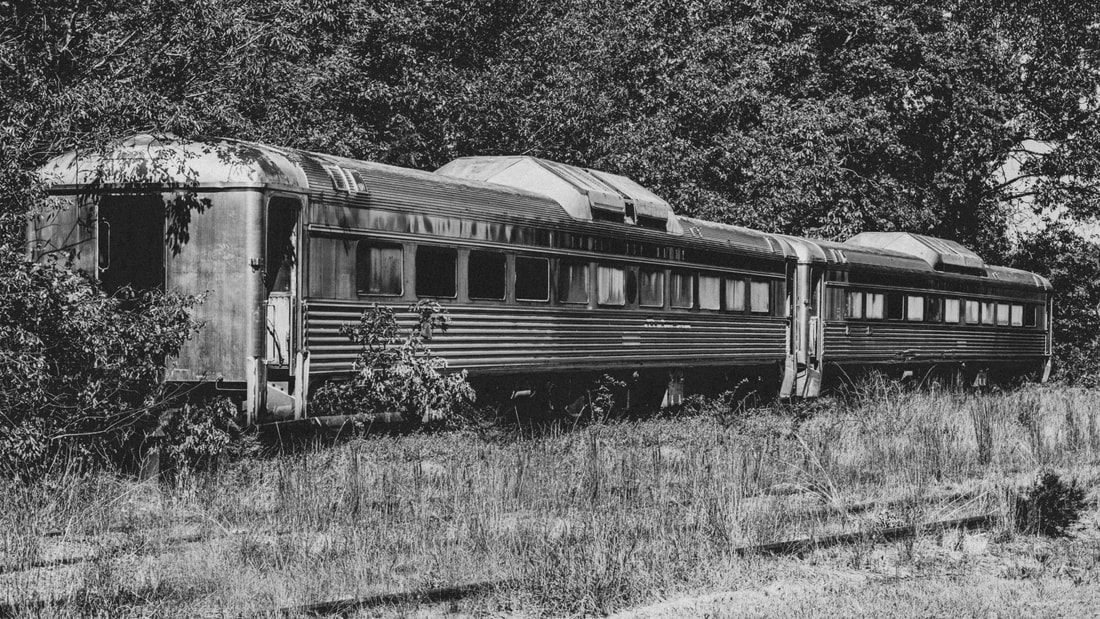 As you know, if you’ve been reading my blog this year, I have been experimenting with different types of photography and techniques with my camera and in post processing. Black & White photography is something that, for the longest time, I didn’t understand. Why would you want to take a picture in black and white when there is color available now? I thought it was just outdated. Now, I understand differently. One reason you may want to take pictures in black and white is to actually remove color from a scene—to simplify the scene. It may not need the color. The color may detract from the subject. Removing the color may get your audience to focus on the subject in the photo. For instance, in the picture I’ve posted, if the trees in the background were flowering and the weeds in the foreground had flowers, they would draw my viewers attention away from what I want them to notice (which is the abandoned train). Having the image in Black & White, fixes this issue. You can’t notice any flowers. Nothing distracts you from the train. Sure, there are many other reasons to photograph in Black & White, but I thought I would just give an example in this blog entry. Perhaps, in the future, I’ll discuss other reasons. Although this is a Black & White image, I encourage you to take the image in color. Then, convert it to a black and white image in post processing. You can always change your mind, if you have the color version available, and go back to it. You have a lot of flexibility when you start with a color file. In post-processing, you’re able to adjust the “colors” –even after you’ve converted the image to black & white. For Instance, you could darken/lighten the green channel to make the color of the trees change in a monochrome image. You wouldn’t be able to do that if you shot the image in black & white. So, shoot your images in color—with the intention of processing it as a Black & White Photo. You have to train your eye to see differently to do black & white photography. Some cameras have a setting to let you see in black & white, while shooting in color. It can help you see your images. Give Black & White a try! Want to Learn Photography?
Click Here 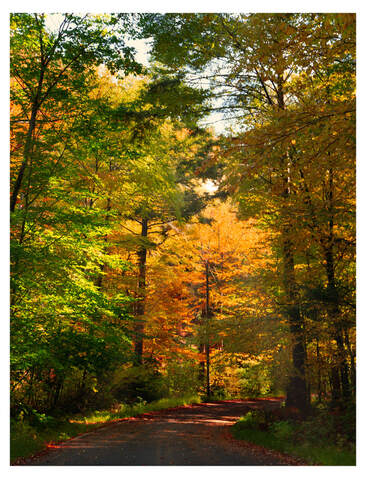 Autumn is my favorite time of the year. I love the crisp air, the EVERYTHING pumpkin, but I especially love to grab my camera to capture the fall colors! Where do I go for the fall colors? When I plan a trip to photograph the changing colors of the trees, I always start by looking online at fall foliage prediction maps. They are a great tool for showing when the peak times for fall foliage is in different areas of the country. I, simply, search for the fall foliage maps in the areas I’m interested in going to, and I’m off!! One piece of gear that I make sure to take with me is a circular polarizer. It’s useful for a few main reasons. The first reason has to do with the fact that some leaves have a shiny look that is reflective and seems to cut the vividness of the colors. The polarizer has the ability to cut through glare that often appears on leaves. When it has been raining, the wet leaves reflect even more light than the dry leaves. The polarizer is effective in reducing this glare too. Another use for polarizers is intensifying the color in your image. You may be able to replicate it during post-processing, buy why not get it right in camera? You can choose the exact amount of saturation by merely turning the circular polarizer, on the front of the lens. As far as the glare is concerned, that is one effect you can’t delete in post-processing—only a circular polarizer will take away glare in your pictures. My favorite time to photograph is during golden hour. I love the warm light on the warm color tones of orange, red and yellow leaves. It makes them more vibrant. The fabulous light quality makes it worth the struggle of waking up early or staying out late to catch images on photo locations. |
What Is This Page?Since I love photography and teaching, I thought I would start a Blog page and share how I take my images, what I was thinking and about me. Categories
All
Archives
March 2022
Ready to Order
|
 RSS Feed
Proudly powered by Weebly